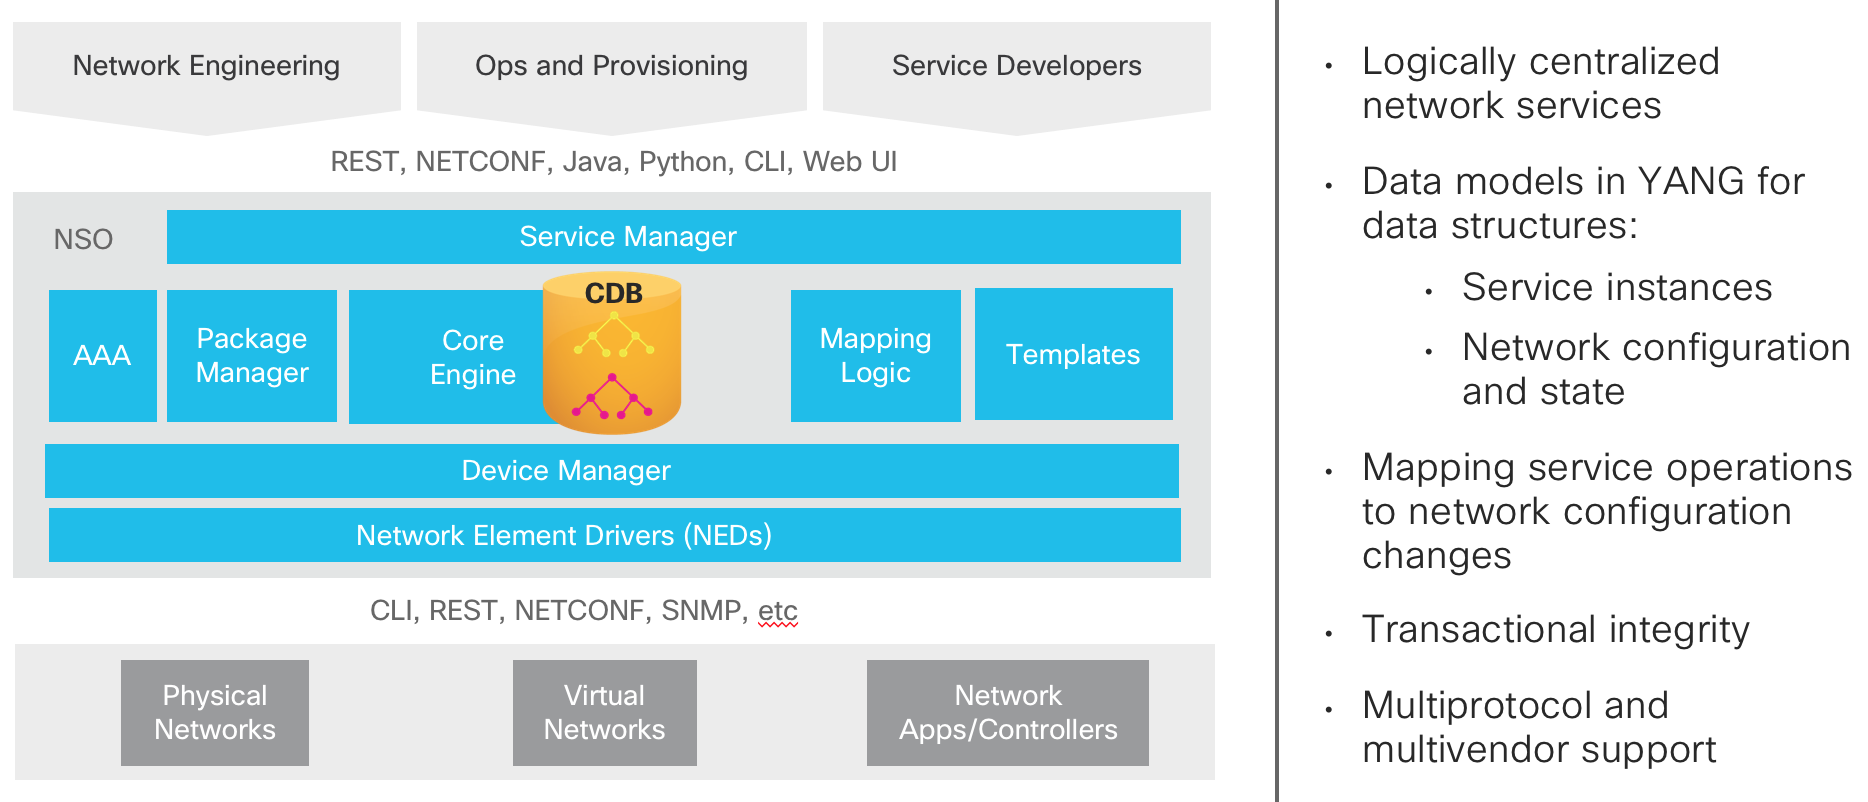
Cisco NSO
Start NSO
-
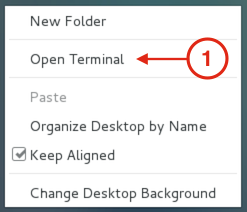
Launch another Terminal session that will be used to login to your NSO instance running on your CentOS VM (not within your container).
-
You then need to source a file to make some environment variables active to use with NSO. This is standard and available when the product is installed. You will need them in this lab to start your NSO instance and create your service template.
source /home/pod00user/nso-4.6.1/ncsrc cd /home/pod00user/nso-run/ ncs -
To start NSO, you need to change directory to the runtime directory and using the alias
ncs.cd /home/pod00user/nso-run/ ncs
Login to NSO
-
SSH to your NSO instance using
ssh admin@localhost -p 2024by coping the syntax below and passwordadmin. This is the default SSH port and admin password. -
Once logged in, issue the command
switch clito shift the CLI to a more conventional CLI.switch cli -
Lets now load the NEDs/packages that are available in this lab.
packages reloadadmin@ncs# packages reload >>> System upgrade is starting. >>> Sessions in configure mode must exit to operational mode. >>> No configuration changes can be performed until upgrade has completed. >>> System upgrade has completed successfully. reload-result { package cisco-ios result true } reload-result { package cisco-iosxr result true } reload-result { package cisco-nx result true } admin@ncs# -
Check installed NEDs/packages:
show packages package descriptionYour package output should look like the below:
                    admin@ncs# show packages package description
                    NAME         DESCRIPTION
                    --------------------------------------------------------------
                    cisco-ios    NED package for the Cisco IOS
                    cisco-iosxr  NED package for the Cisco IOS XR
                    cisco-nx     NED package for the Cisco Nexus

                    admin@ncs#
ssh admin@localhost -p 2024
Add Devices to NSO
-
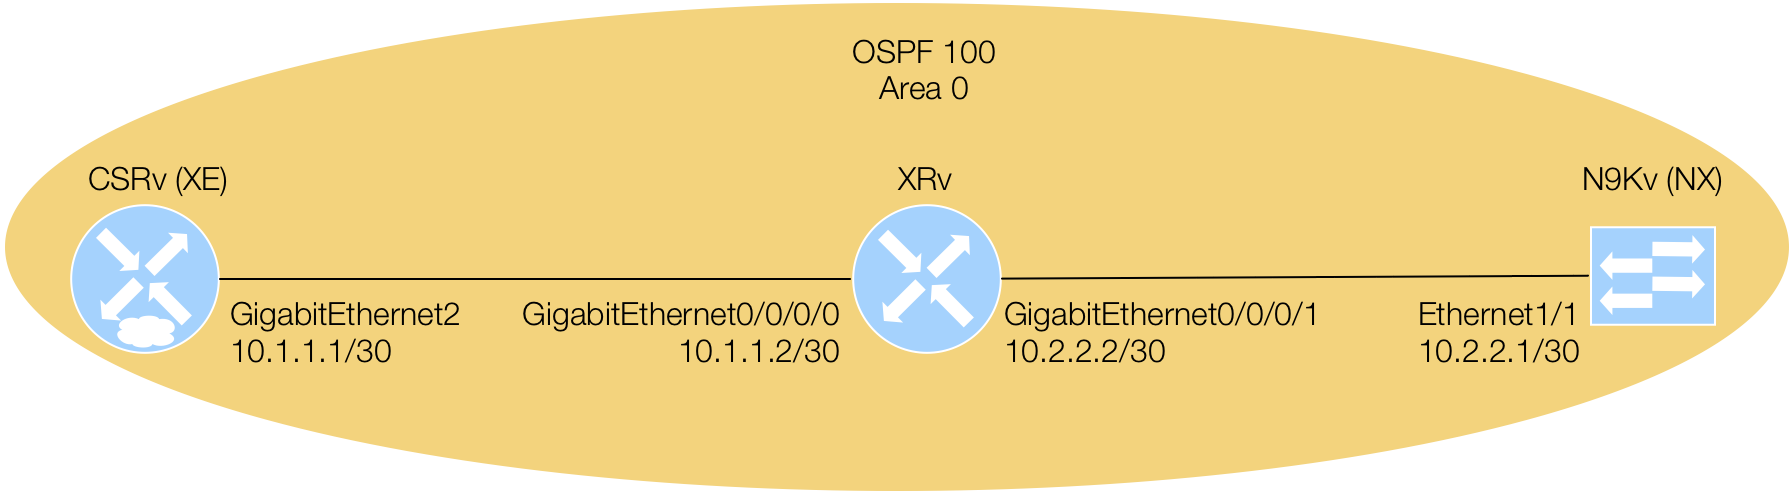
The NSO instance you have is completely empty and contains no devices. You need to add you devices to your NSO instance. You can do this by copying the NSO CLI config text below. Make note, you are using the NEDs/packages from above for the device-type.
                conf
                devices device CSRv
                address 10.2.101.11 port 22
                device-type cli ned-id cisco-ios protocol ssh
                authgroup sdn-group
                state admin-state unlocked
                top
                devices device XRv
                address 10.2.101.12 port 22
                device-type cli ned-id cisco-ios-xr protocol ssh
                authgroup sdn-group
                state admin-state unlocked
                commit
Sync Devices to NSO
-
Once the devices have been added to NSO, you need to let NSO sync the current configuration of your devices, i.e. the interface config, OSPF config, and BGP config that has been performed up to this point in the lab. To do so, NSO first needs to fetch the SSH keys using the device's username and password that was stored in the
sdn-groupauthgroup above.devices fetch-ssh-host-keysThis is the return on the NSO CLI that NSO has fetched you device SSH keys.
fetch-result { device CSRv result updated fingerprint { algorithm ssh-rsa value e3:47:f6:15:5f:64:9f:c3:3e:2d:64:67:92:e3:66:3b } } fetch-result { device XRv result updated fingerprint { algorithm ssh-rsa value 77:11:19:be:da:9c:b6:8a:21:f7:9f:fe:02:36:f1:f9 } } -
Now that NSO can access your devices via SSH, you need to perform the sync operation.
devices sync-fromsync-result { device CSRv result true } sync-result { device XRv result true }
Exit NSO to Host CLI
With your devices added to NSO (as easy as that!), you now need to exit NSO. This is required to return to the Linux/CentOS host where you will change directory to the NSO packages directory to start creating your custom service.
            end
            exit