Build Docker Image
In this module, we will explore pulling Docker images from Docker Hub, and also building Docker Images based on other images. Typically, a Docker container image with either be pre-built and pulled down from some existing container registry (Docker Hub being an example), or alternatively users of Docker can construct Docker files on their own to create hand-tailored images.
Pull a Docker Image
Currently you have no Docker images to build or run a container.
While you simply could perform a docker run
on a supported Docker image and let the Docker image be pulled down automatically, we're going to approach this
in steps.
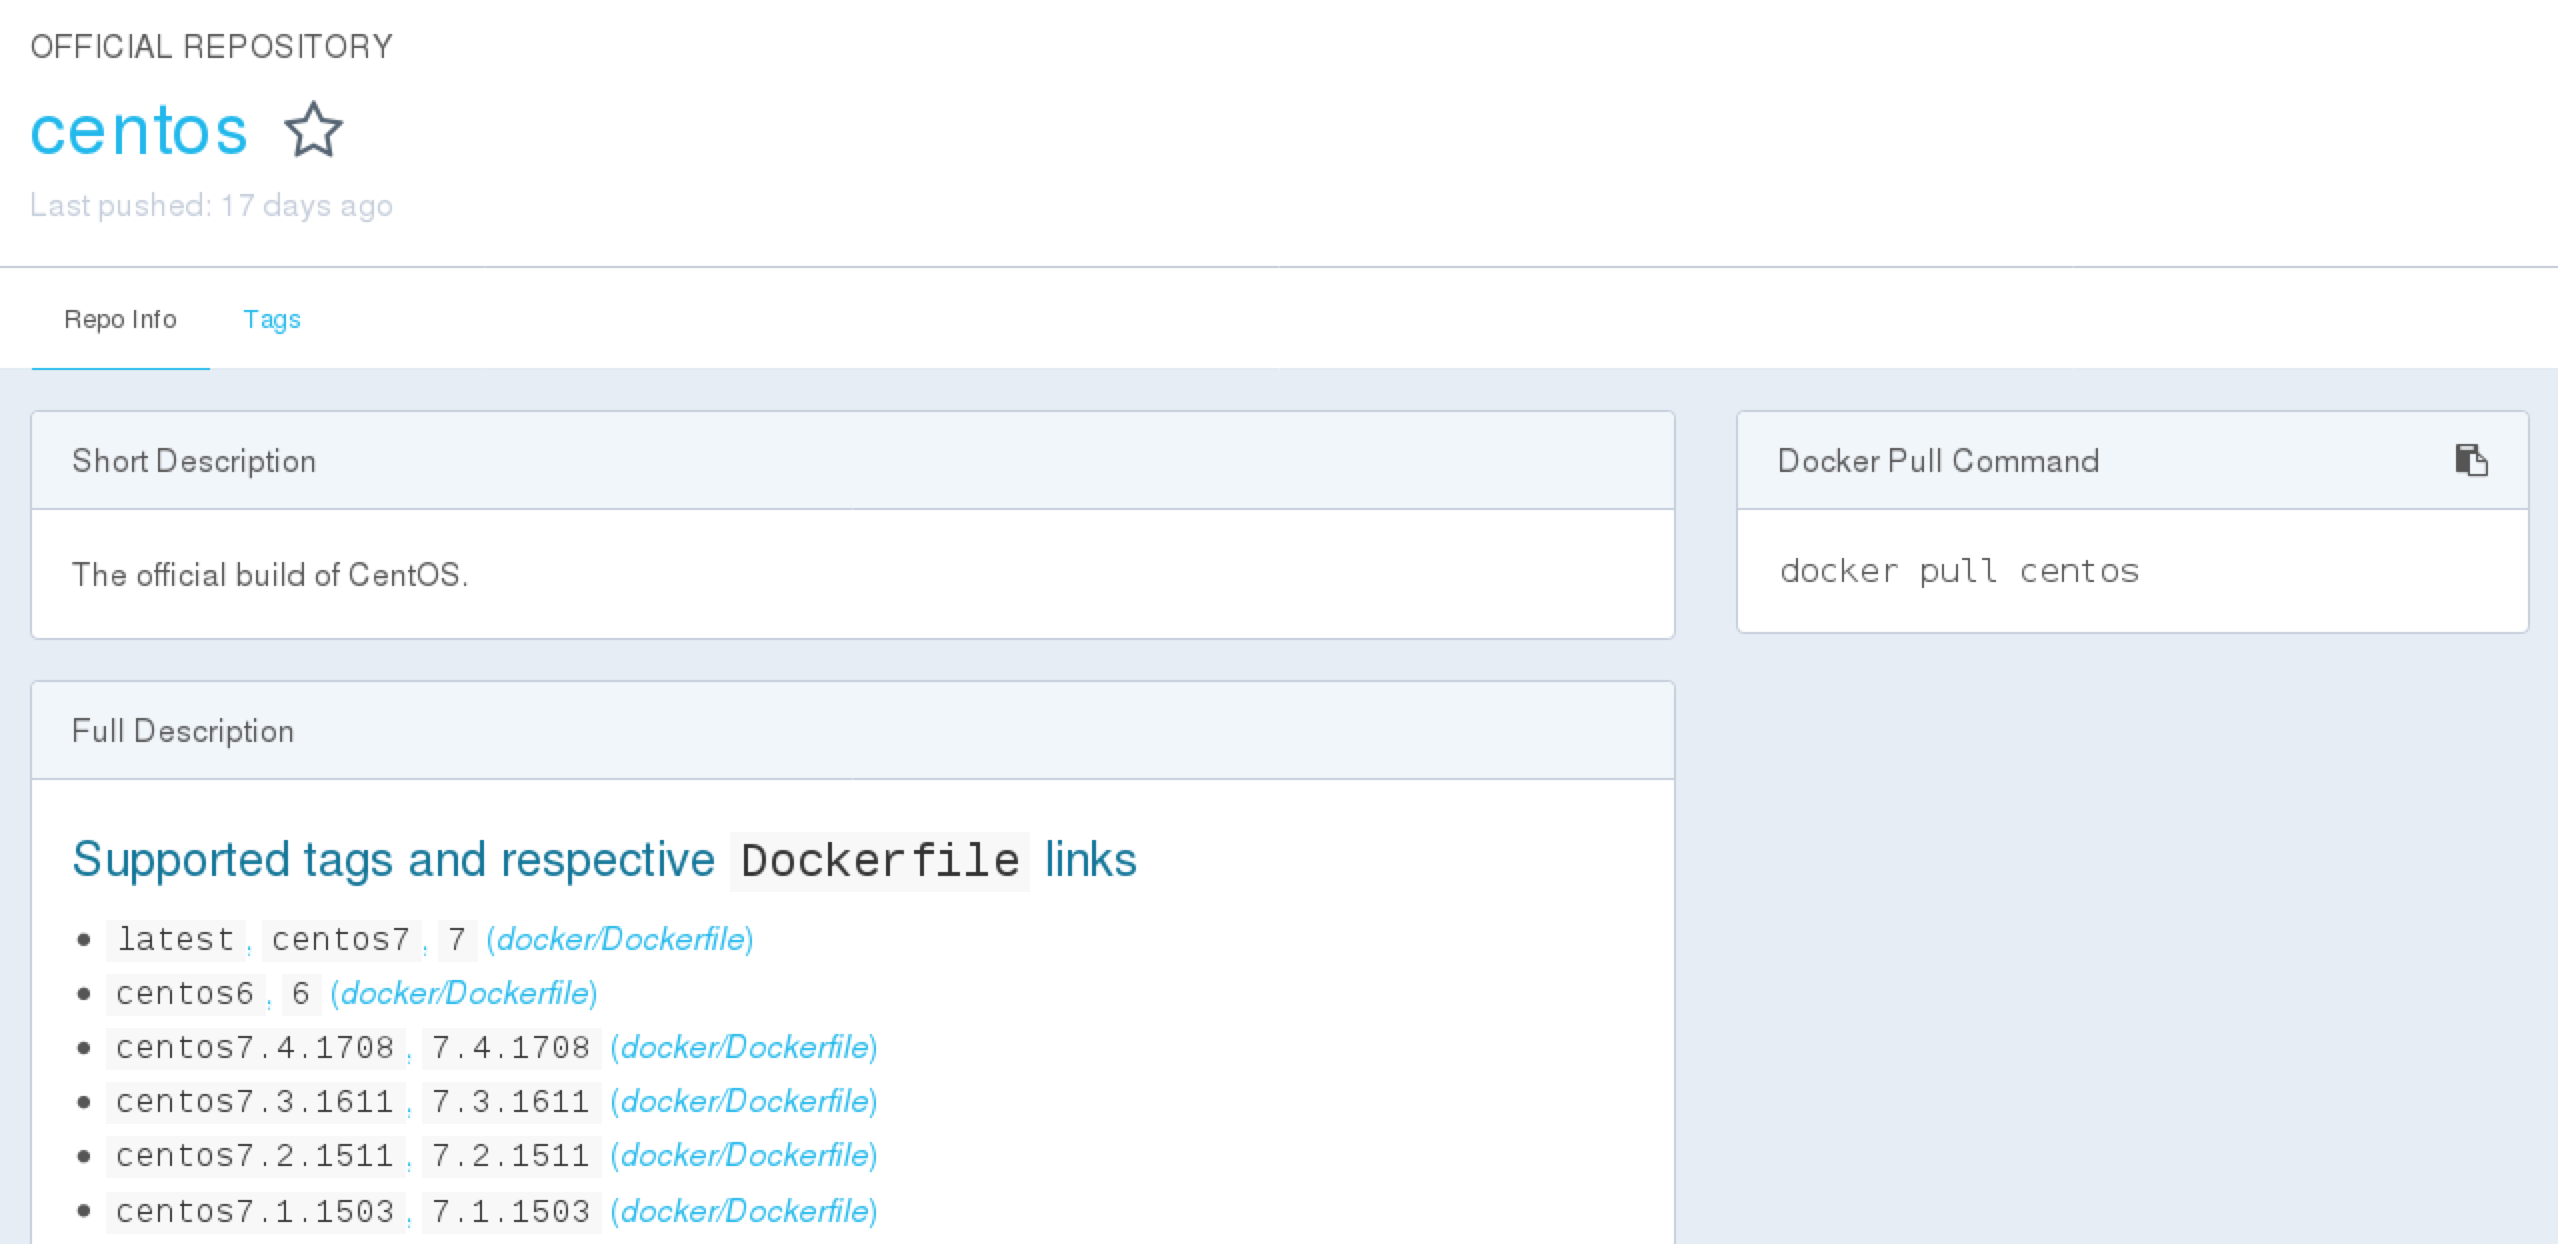
The public Docker Hub contains the various release versions of CentOS Docker images. Feel free to go to Docker Hub and search centos in the search bar.

The search results will contain the official image repository for CentOS:

By clicking on the DETAILS button, you will be presented with information about the CentOS image used to deploy
a CentOS container. One of the key pieces of information is the Tags button. The best practice is to pull an
image using a tag so that you always know what image you are getting. Pulling the image generically does not
mean you will get a container image that your code or application will function on.
For this lab, you are going to pull the
centos:7 image. Make note of the colon to the right of the image name followed by a number.
The colon delineates the image name and a tag. Tags are generally used for release control and version control.
Once you are done looking at the centos image in Docker Hub, perform a docker pull centos:7 that
will pull the image tagged as 7 from the image repo you were just examining. For more
information, please refer to the Docker Docs on
docker pull.
docker pull centos:7
This is the output you should see while the image is pulled from Docker Hub:
            7: Pulling from library/centos
            469cfcc7a4b3: Pull complete
            Digest: sha256:989b936d56b1ace20ddf855a301741e52abca38286382cba7f44443210e96d16
            Status: Downloaded newer image for centos:7
To see the images available directly on your Docker host issue the docker images command.
For more
information, please refer to the Docker Docs on
docker images.
docker images
Your CentOS Docker host should now have the centos:7 Docker image in it's local image repository.
            [pod00user@ciscolive-pod00-centos ~]$ docker images
            REPOSITORY          TAG                 IMAGE ID            CREATED             SIZE
            hello-world         latest              e38bc07ac18e        2 weeks ago         1.85kB
            centos              7                   e934aafc2206        3 weeks ago         199MB
Create a Dockerfile
Docker can build images automatically by reading instructions from a file called a Dockerfile.
A Dockerfile is a simple text document that contains the commands to assemble an image.
Once the Dockerfile is written, you simply need to use docker build to execute these command-line
instructions to automatically build a custom image. Below is the Dockerfile you're going to use to build your
custom image. When the image gets built, it will perform the yum install and pip install of all the libraries
and packages needed for this lab.
The uppercase words are considered the command-line commands. The base of this new image will be the
centos:7 image you just pulled. From there the Dockerfile will run yum install
pip3.6 install commands to install the necessary libraries and packages.
            cat <<EOF >> /home/pod00user/Devel/Dockerfile
            FROM centos:7

            MAINTAINER LTRSDN-2260

            # Install
            RUN yum -y install epel-release
            RUN yum -y update
            RUN yum -y install yum-utils
            RUN yum -y install nano
            RUN yum -y groupinstall development
            RUN yum -y install https://centos7.iuscommunity.org/ius-release.rpm
            RUN yum -y install python36u
            RUN yum -y install python36u-pip
            RUN yum install -y libxslt-devel libssh-devel python36u-pip python36u-devel cmake3 python-pip which make sudo
            RUN yum install -y https://devhub.cisco.com/artifactory/rpm-ydk/0.7.0/libydk-0.7.0-1.x86_64.rpm
            RUN yum install -y centos-release-scl -y
            RUN yum install -y devtoolset-4-gcc* -y
            RUN yum install -y tree
            RUN ln -sf /opt/rh/devtoolset-4/root/usr/bin/gcc /usr/bin/cc
            RUN ln -sf /opt/rh/devtoolset-4/root/usr/bin/g++ /usr/bin/c++
            RUN yum -y install wireshark git
            RUN yum -y install openconnect
            RUN yum -y install cmake
            RUN pip3.6 install --upgrade pip
            RUN yum install -y epel-release
            RUN yum install -y libssh-devel gcc-c++
            RUN yum install -y centos-release-scl -y > /dev/null
            RUN yum install -y devtoolset-4-gcc* -y > /dev/null
            RUN ln -sf /opt/rh/devtoolset-4/root/usr/bin/gcc /usr/bin/cc
            RUN ln -sf /opt/rh/devtoolset-4/root/usr/bin/g++ /usr/bin/c++
            RUN yum install -y https://devhub.cisco.com/artifactory/rpm-ydk/0.7.1/libydk-0.7.1-1.x86_64.rpm
            RUN pip3.6 install ydk==0.7.1
            RUN pip3.6 install --install-option="--install-purelib=/usr/lib64/python3.6/site-packages" --no-deps ydk-models-ietf==0.1.5
            RUN pip3.6 install --install-option="--install-purelib=/usr/lib64/python3.6/site-packages" --no-deps ydk-models-openconfig==0.1.5
            RUN pip3.6 install --install-option="--install-purelib=/usr/lib64/python3.6/site-packages" --no-deps ydk-models-cisco-ios-xr==6.3.2
            RUN pip3.6 install ansible==2.5.2
            RUN pip3.6 install appdirs==1.4.3
            RUN pip3.6 install backports.ssl-match-hostname==3.4.0.2
            RUN pip3.6 install flake8==3.5.0
            RUN pip3.6 install future==0.16.0
            RUN pip3.6 install iniparse==0.4
            RUN pip3.6 install IPy==0.75
            RUN pip3.6 install pika==0.11.2
            RUN pip3.6 install Pillow==4.1.0
            RUN pip3.6 install prettytable==0.7.2
            RUN pip3.6 install pyparsing==2.2.0
            RUN pip3.6 install pytest==3.6.0
            RUN pip3.6 install pytest-cov==2.5.1
            RUN pip3.6 install redis==2.10.6
            RUN pip3.6 install requests==2.18.4
            RUN pip3.6 install ruamel.yaml==0.15.37
            RUN pip3.6 install pyang==1.7.5
            RUN pip3.6 install pyaml==17.12.1
            RUN pip3.6 install ncclient==0.5.3
            RUN pip3.6 install xmltodict==0.11.0

            # Make python3.6 default
            RUN echo 'alias python=python3.6' >> ~/.bashrc
            RUN echo 'alias pip=pip3.6' >> ~/.bashrc

            # Change to workspace directory
            WORKDIR /workspace
            ENV PYTHONDONTWRITEBYTECODE 1

            # Build with docker build -t ltrsdn-2260 .
            # Enter container with: docker run -it --privileged=true -v `pwd`:/workspace ltrsdn-2260-lab bash

            EOF
Create a Docker Image from a Dockerfile
Once you've created the Dockerfile, you need to execute a docker build. The -t option
is used to tag, or rename the Docker image. Upon either copying or typing the below commands, it will build the
image. This process can take a little time, but shouldn't take too long. For more
information, please refer to the Docker Docs on
docker build.
            cd /home/pod00user/Devel/
            docker build -t ciscolive .
Once the image has finished building, verify it's in your Docker host's local repository. If so, you're now ready to deploy a container using that image.
docker images
Your local Docker repository should look like the below:
            [root@ciscolive-pod00-centos pod00user]# docker images
            REPOSITORY          TAG                 IMAGE ID            CREATED             SIZE
            ciscolive           latest              e2506994a57a        37 minutes ago      1.88GB
            hello-world         latest              e38bc07ac18e        2 weeks ago         1.85kB
            centos              7                   e934aafc2206        3 weeks ago         199MB
Continue on to the next module to learn how to start a Docker container that mounts an external volume. The container you start in the next module will be your development container environment going forward.