Getting NETCONF Capabilities with ncclient
When you enabled the MDP interfaces, one of the verification steps was to see the available capabilities in the hello exchanged from each platform. As you may remember, this was a lot of output and it was advised to not NETCONF in this manner. To get started with using ncclient, lets use this library to query a device for it's capabilities into a Python data structure where we can do some more meaningful things. You're going to make use of the Manager class mentioned in the previous section and a method available via that Python object.
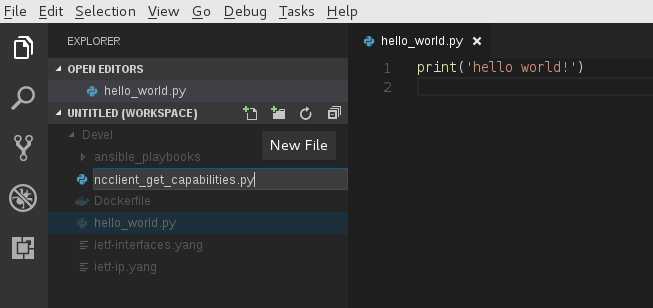
Create New Python File
Return to Visual Studio Code and create a new Python file called ncclient_get_capabilities.py.
You can copy this file below for ease.
ncclient_get_capabilities.py
Required Library Imports
On the first line of your new Python file, you want to add the imports you will need for the rest of your code. The first import is from ncclient that imports the manager class for connecting to and issuing XML RPCs for getting and editing configuration. The second import is simply to prettify some of the data that you will be working with. Either type or copy and paste the lines of code into the top of your file. The copy and paste will also take care of the proper spacing after the imports for proper Python compliance.
            from ncclient import manager
            from prettytable import PrettyTable
Create Device Dictionary
You are now going to create a poor man's database in Python in the form of a device dictionary that we can iterate over to allow us to get the capabilities from each device without having to duplicate code, thus making your code reusable for N number of devices. Create a dictionary containing your device names, and the connectivity information required. Either type or copy and paste the code into your Python file. If you type the dictionary by hand, ensure you follow proper indentation; the copy and paste feature takes care of this for you.
# Dictionary containing device connectivity information.
devices = {
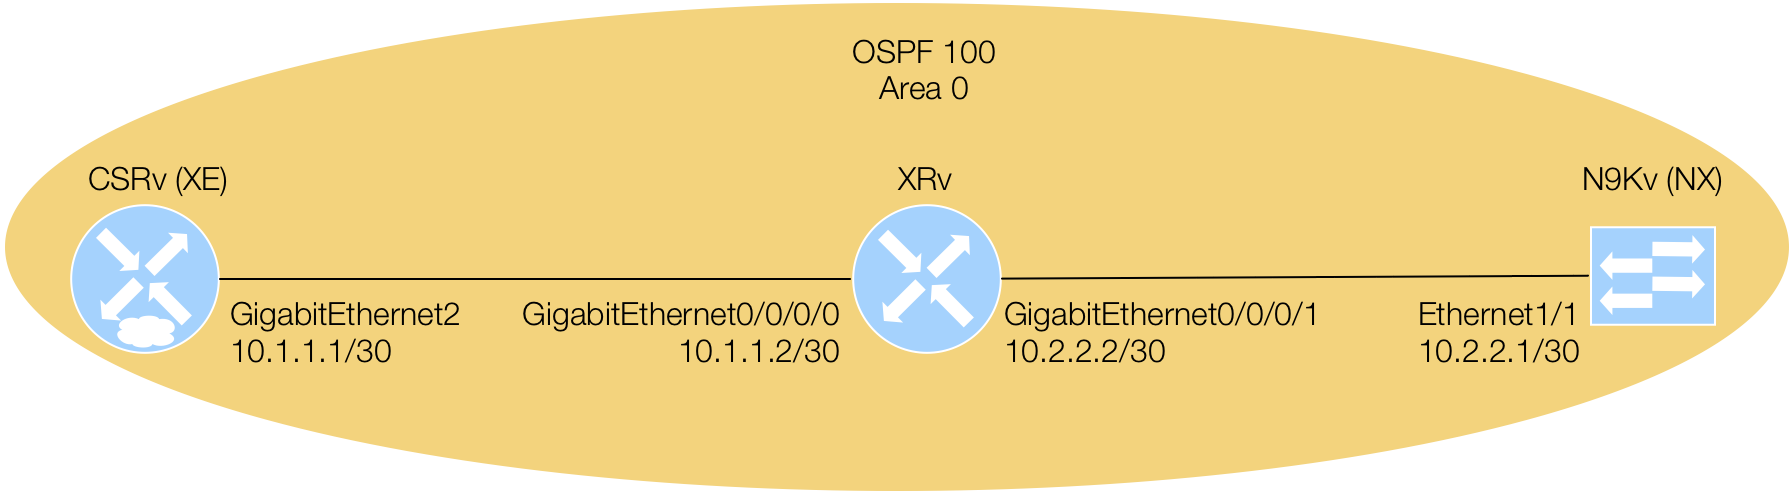
"Pod00-CSRv-XE": {"ip": "10.2.100.11", "port": "830", "platform": "csr",},
"Pod00-XRv-XR": {"ip": "10.2.100.12", "port": "830", "platform": "iosxr",},
"Pod00-N9Kv-NX": {"ip": "10.2.100.13", "port": "830", "platform": "nexus",},
}
The next step will setup the Python needed to iterate over the different key/value pairs.
Setup Outer For Loop Around ncclient Manager Object
To iterate over the devices, means to iterate over a Python dictionary. To accomplish this you can use a simple for loop to iterate over the key/value pairs of the devices as follows:
        for device, properties in devices.items():
            ip = properties["ip"]
            port = properties["port"]
            platform = properties["platform"]
            print(f"Connecting to device: {device}")

            # Context manager keeping ncclient connection alive for the duration of
            # the context.
            with manager.connect(
                host=ip,                            # IP address of device
                port=port,                          # Port to connect to
                username='admin',                   # SSH Username
                password='cisco.123',               # SSH Password
                hostkey_verify=False,               # Allow unknown hostkeys not in local store
                device_params={'name': platform}    # Device connection parameters
            ) as m:  # Context manager reference, i.e. instance of connected manager
                # .... The rest of your interaction with the device will go in this nested block ....
With the manager object created, we will now proceed to discover YANG models that the device supports.
Get Model Capabilities
You will now use the manager class' server_capabilities method to pull the devices capabilities
and store these in a list for later use. The code block needs to sit nested within
the manager instantiation. The copy feature handles this indentation for you.
                    capabilities = []
                    # The rest of your script code should go here
                    # Write each capability to console
                    for capability in m.server_capabilities:
                        # Print the capability - for reference
                        #print("Capability: %s" % capability)
                        # Store the capability list for later
                        capabilities.append(capability)

                    # Sort the list alphabetically
                    capabilities = sorted(capabilities)
Display Model Capabilities
Let's print the model capabilities from the device in an easy to visualize fashion. To accomplish this, you will leverage the PrettyTable library you imported in the very beginning of this section. The code block needs to sit nested within the manager instantiation. The copy feature handles this indentation for you.
                        # Add two additional keys to your device dictionary that have an empty list value
                        # To be used later
                        devices[device]["capabilities_long"] = []
                        devices[device]["capabilities_short"] = []

                        # Build a table to pretty print the capabilities short names.
                        table_short = PrettyTable()
                        table_short.field_names = [device + ' Capabilities (Short)']
                        table_short.align[device + ' Capabilities (Short)'] = 'l'
                        for capability in m.server_capabilities:
                            devices[device]["capabilities_short"].append(capability.split('?')[0])
                            table_short.add_row([capability.split('?')[0]])

                        # Print table to standard out.
                        print(table_short)

                        # Build a table to pretty print the capabilities long names.
                        table_long = PrettyTable()
                        table_long.field_names = [device + ' Capabilities (Long)']
                        table_long.align[device + ' Capabilities (Long)'] = 'l'
                        for capability in m.server_capabilities:
                            devices[device]["capabilities_long"].append(capability)
                            table_long.add_row([capability])

                        # Print the table.
                        print(table_long)
Execute Python Script
After building out your code, save your Python script with either Ctrl+s or File > Save in VS Code. Now, lets execute your code!
Return to your Terminal window, where you are attached to the CLI of your Docker container. Lets move to the appropriate directory and execute your script:
cd /workspace/
python3.6 ncclient_get_capabilities.py
Below is an excerpt of what your output should look like for table_short. As you can see, this is a shorthand of the advertised capability that is easy to read.
        +-----------------------------------------------------------------------------------+
        | Pod00-XRv-XR Capabilities (Short)                                                 |
        +-----------------------------------------------------------------------------------+
        | urn:ietf:params:netconf:base:1.1                                                  |
        | urn:ietf:params:netconf:capability:candidate:1.0                                  |
        | urn:ietf:params:netconf:capability:rollback-on-error:1.0                          |
        | urn:ietf:params:netconf:capability:validate:1.1                                   |
        | urn:ietf:params:netconf:capability:confirmed-commit:1.1                           |
        | urn:ietf:params:netconf:capability:notification:1.0                               |
        | urn:ietf:params:netconf:capability:interleave:1.0                                 |
        | urn:ietf:params:xml:ns:yang:ietf-netconf-monitoring                               |
        | http://cisco.com/ns/yang/cisco-xr-ietf-netconf-monitoring-deviations              |
Below is an excerpt of what your output should look like for table_long. This output is similar to what you saw on the Terminal when you SSH'd directly to the device.
        +---------------------------------------------------------------------------------------------------------------------------------------------------------------------------+
        | Pod00-XRv-XR Capabilities (Long)                                                                                                                                          |
        +---------------------------------------------------------------------------------------------------------------------------------------------------------------------------+
        | http://cisco.com/ns/yang/cisco-xr-ietf-netconf-monitoring-deviations?module=cisco-xr-ietf-netconf-monitoring-deviations&revision=2016-02-16                               |
        | http://cisco.com/ns/yang/Cisco-IOS-XR-ip-daps-cfg?module=Cisco-IOS-XR-ip-daps-cfg&revision=2015-11-09                                                                     |
        | http://cisco.com/ns/yang/Cisco-IOS-XR-ip-rib-ipv6-oper?module=Cisco-IOS-XR-ip-rib-ipv6-oper&revision=2015-11-09                                                           |
        | http://openconfig.net/yang/interfaces/ethernet?module=openconfig-if-ethernet&revision=2016-05-26&deviations=cisco-xr-openconfig-if-ethernet-deviations                    |
        | http://cisco.com/ns/yang/Cisco-IOS-XR-ipv6-acl-oper?module=Cisco-IOS-XR-ipv6-acl-oper&revision=2017-05-01                                                                 |                                                                                                                      |
Continue to the next section where you will continue to use ncclient for a get-config operation and that is verifying the interface configuration that you provisioned using Ansible NETCONF.