Editor Setup
There are many free editors and IDEs that developers use. Visual Studio Code, PyCharm, Atom, Sublime, etc are just a few examples. In this lab module you will setup Visual Studio Code as your code editor.
Open Visual Studio Code and Create a Project
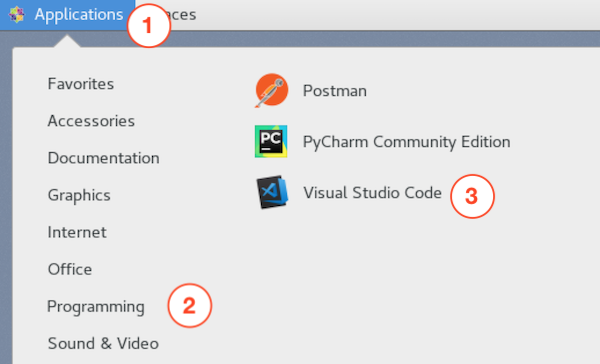
In your CentOS VM, under the Applications menu drop down, hover over Programming, then click Visual Studio Code to the right to open.
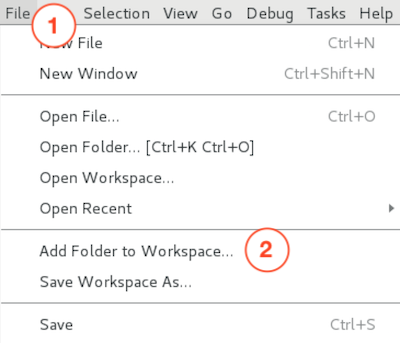
Once Visual Studio Code opens, click File, then click Add Folder to Workspace.... This will open a popup window.
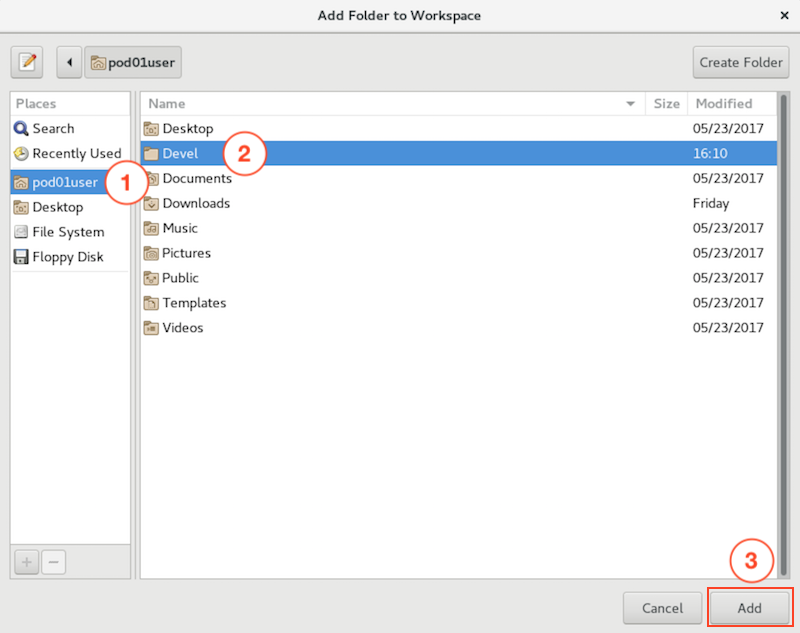
In the Add Folder to Workspace popup, navigate to your home directory, pod00user/ and then click Devel. Lastly click Add to finish adding the folder to your VS Code workspace.
Within VS Code, the directory structure and files by default are maintained on the left underneath your
workspace. Expand the Devel folder if it is not already done.
Make note of the Dockerfile you created earlier and also that you saw residing within your
container along with two additional .yang files. For this lab, you will want the Python Extension
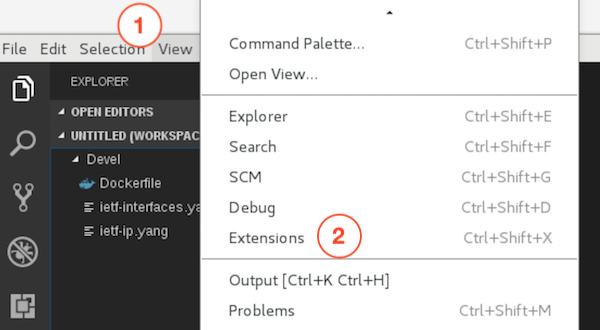
for VS Code. To install, click View, then in the dropdown, click Extensions. In VS Code, this
will navigate you to the Extension Marketplace.
In the Extension Marketplace, search Python. The extension you should see at the top-left is the Python extension that is installed.
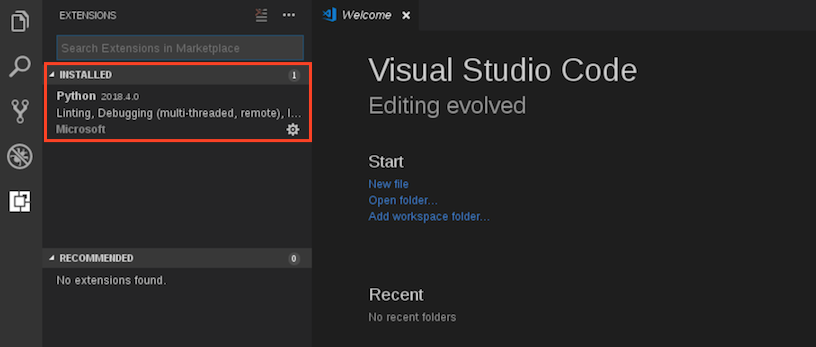
You can click on the extension to see more information about it.

Create Hello World to Test Dev Env
Navigate back to your workspace by clicking the workspace icon on the far top left. Back in your workspace, click the New File button.
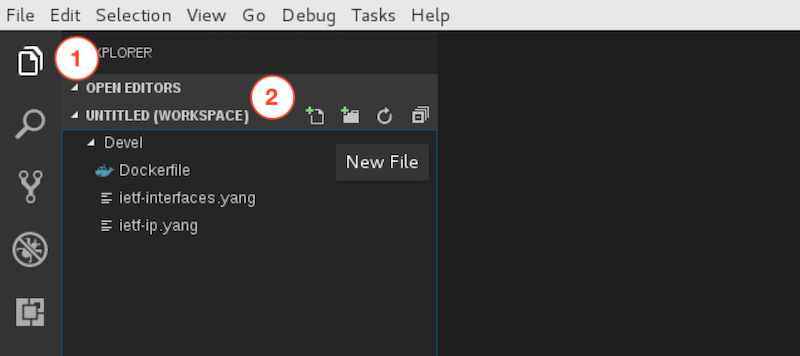
Name this new file hello_world.py. Upon creation, the file should automatically open in the right pane.
hello_world.py

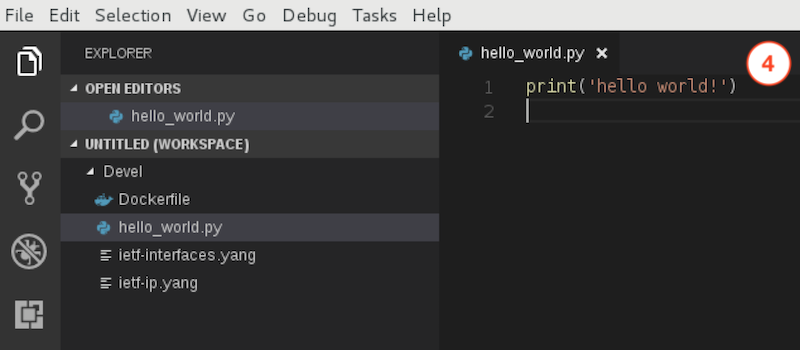
Add the single print statement to the hello_world.py Python file by either typing or copying/
pasting the text below. Then either use Ctrl+S or File > Save to save your Python file.
print('hello world!')
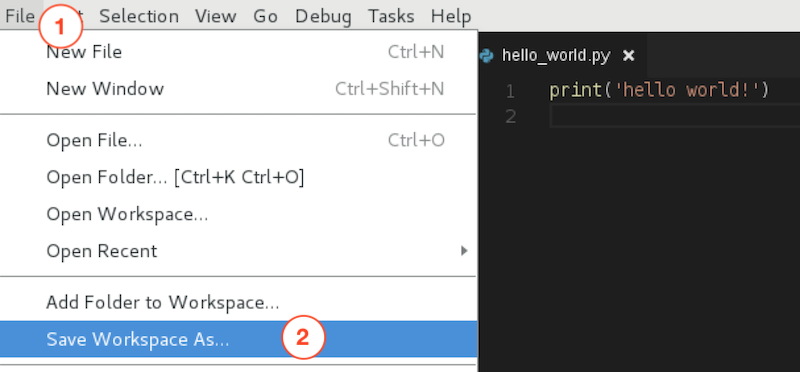
Now that you've created a workspace with some file in it within VS Code, you need to save your entire workspace. Do this by clicking File, then Save Workspace As...
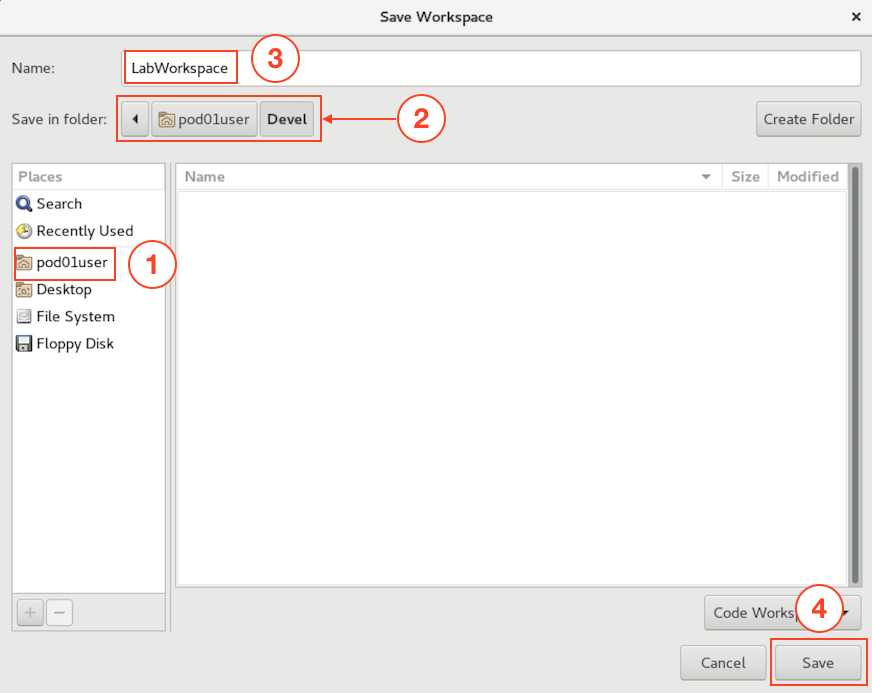
Again, click on your home directory, pod00user/, in the left column, then Devel. Name the workspace LabWorkspace and then click Save.
LabWorkspace
Execute Hello World! in Docker Container
Return to your open Terminal window that should be attached to your container. Type ls and you will see
your newly created Python file.
ls
            [root@a54b8d86e375 workspace]# ls
            LabWorkspace.code-workspace  hello_world.py  ietf-interfaces.yang  ietf-ip.yang
            [root@a54b8d86e375 workspace]#
Type
python3.6 hello_world.py or use the copy feature below and hit Return/Enter to execute your first bit of code for this lab!
python3.6 hello_world.py
The response output you should receive to the Terminal window is "hello world!":
            [root@54322b054a34 workspace]# python3.6 hello_world.py
            hello world!
            [root@54322b054a34 workspace]#
This completes the setup of your development environment. You have successfully built a container image using a Dockerfile, started a Docker container using the image you built and mounting a volume directory local to the Docker host machine, and mapped a local text editor/IDE to the directory mapped into your container where you perform local development. Finally, you executed a simple Python hello world! test script using your container as your execution environment.