Run Docker Container
This module explores running Docker containers based on images you have either pulled or built. If you are new to Docker, think of running a container as if you are running a lightweight linux-based virtual machine. The running container has it's own filesystem, set of processes, and is sandboxed/isolated from your host operating system acting as the container host, kind of like a hypervisor. From a component perspective, it looks like this:
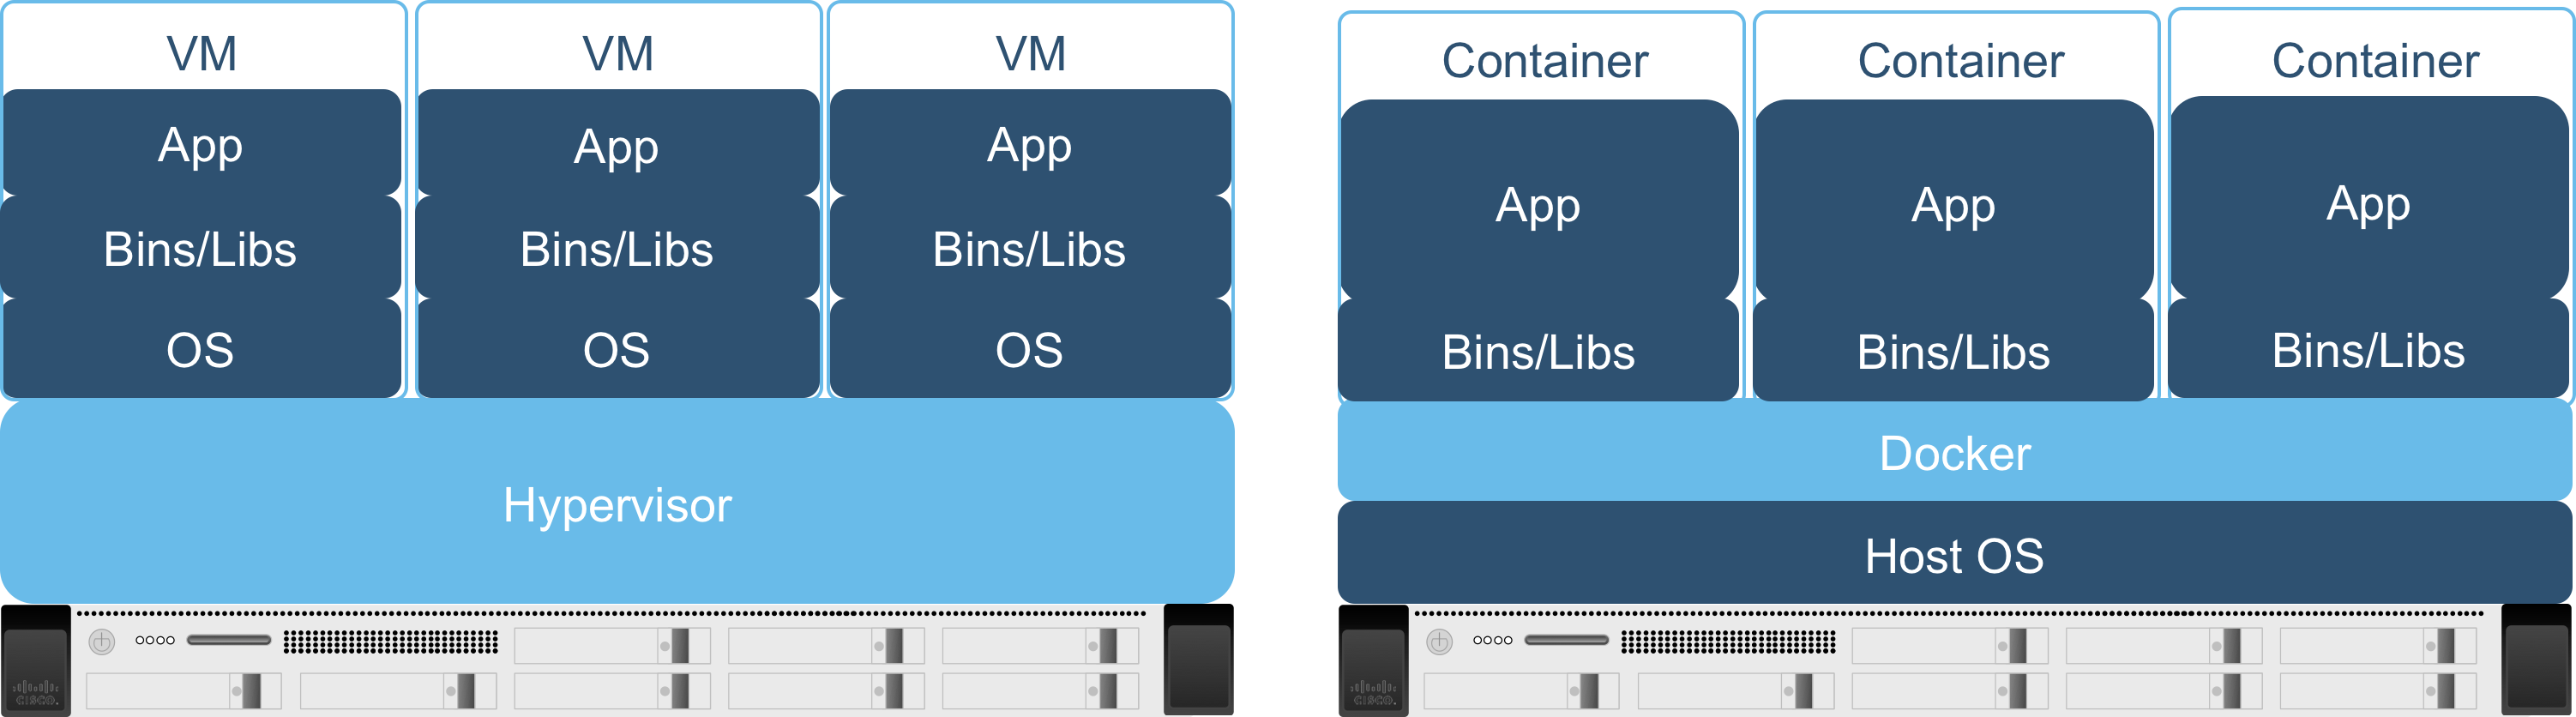
The key distinction is Docker Containers are not running a full blown OS stack within the container; the container manager acts as a pass-thru for Posix calls to the host operating system.
Run Docker Container
Now that you've built your own custom Docker image, it's time to start a container. To do so, you can
use docker run.
In this lab, you're going to run the container using a few commandline options.
The -it options are used to enable an interactive pseudo-TTY session with the
container once deployed. The --privileged=true option is used to provide the container host-like
capabilities. This is needed due to the next option used, -v. The -v option stands for
volume and is used to mount the current working directory into the container. The :/workspace
mounts this directory as workspace within the container.
For purposes of your development
environment, this is how we're going to mount the code and playbooks that are developed locally into the
container that contains your execution environment, i.e. Python interpreter. The -d option stands
for detached and specifies to run the container in the background. This could be useful for example if you
were to start a web app, but for this lab, it simply means that you must attach to the container after it starts
instead of automatically being dropped directly into the bash prompt. The --name option lets you
specify a name for your container. Here you're going to use the Cisco Live code that represents this session,
ltrsdn-2260.
You then must specify the
container image name to be used as the image for the container; in this case ciscolive that you
built in the previous module.
Lastly, the bash command works in coordination with the -it options for interacting
with a bash prompt within the container. For more
information, please refer to the Docker Docs on
docker run.
            cd /home/pod00user/Devel/
            sudo docker run -it --privileged=true -v `pwd`:/workspace -d --name ltrsdn-2260 ciscolive-docker-registry-2:5000/ltrsdn-2260 bash
The docker ps command is used to list running containers. Adding the commandline option
-a show all containers, regardless if they are running or not.
For more
information, please refer to the Docker Docs on
docker ps.
sudo docker ps -a
Notice your ltrsdn-2260 running container:
            [root@ciscolive-pod00-centos Devel]# docker ps -a
            CONTAINER ID        IMAGE                                          COMMAND             CREATED             STATUS              PORTS               NAMES
            b2d920ff6763        ciscolive-docker-registry-2:5000/ltrsdn-2260   "bash"              10 seconds ago      Up 9 seconds                            ltrsdn-2260
Attach to Docker Container
Now that your container is up and running, you need to connect to it. You achieve this by using the
docker exec -it [container id | container name] or docker attach [container id | container name] command.
For this lab, you'll use docker exec. This is because if you exit the container by typing exit, the
container will still run on the host, however, had you used docker attach, upon an exit, the container stops.
You can safely exit a container also by using Ctrl+p + Ctrl+q
For more
information, please refer to the Docker Docs on
docker exec
and
docker attach.
sudo docker exec -it ltrsdn-2260 bash
Once you are attached to your container, issue an pwd and ls. Notice that you are in
the workspace directory, which you specified on the commandline as the name of your container
directory when you started the container with a volume mount from the host machine (i.e. your CentOS VNC).
Within the directory, take note of the Dockerfile that actually resides in your Devel directory.
pwd
ls
            [root@ciscolive-pod00-centos Devel]# sudo docker exec -it ltrsdn-2260 bash
            [root@54322b054a34 workspace]# pwd
            /workspace
            [root@54322b054a34 workspace]# ls
            Dockerfile  ietf-interfaces.yang  ietf-ip.yang
            [root@54322b054a34 workspace]#
Lets seed some shortcut aliases into your container's .bashrc file for later in the lab:
            cat <<EOF >> /root/.bashrc
            alias xe='ssh admin@10.2.100.11'
            alias xr='ssh admin@10.2.100.12'
            alias nx='ssh admin@10.2.100.13'

            EOF
Then source .bashrc to enable the aliases.
. /root/.bashrc
Continue to the next module to finish setting up your development environment using an editor for local development.