
Configure OSPF using ncclient
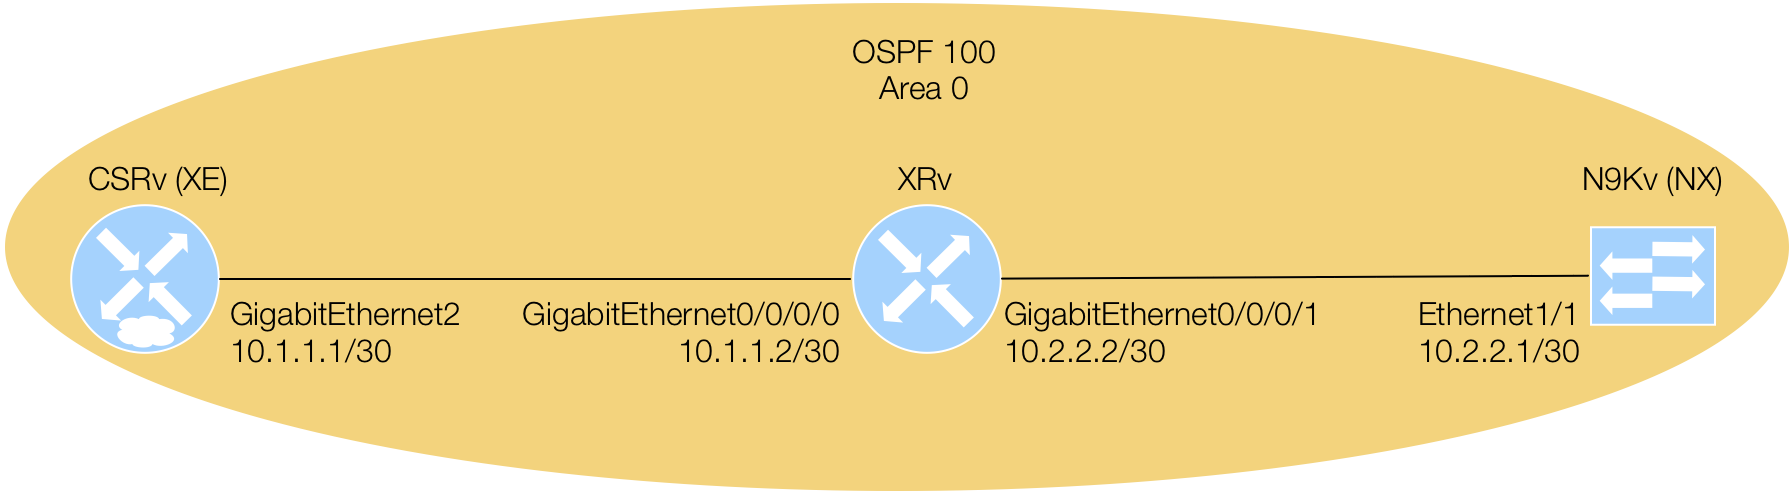
Now that you have IP addresses on your device's interface(s), your going to enable OSPF across them such that the XE device peers with the XR device, and the XR device peers with the NX device; all in Area 0. As mentioned numerous times, how your interfaces were actually configured with Ansible used similar bits of code as you will develop below.
For this task in the lab, you will make use of the Native YANG models. The reason being, there is not support in either the IETF or OpenConfig or support across all platforms to use the same exact YANG model(s).
The format of the Python code below and for each example in this section of the lab is the same, except for the usage of each platforms Native model definition for configuring OSPF. In each Python script section, there are corresponding truncated YANG snippets to assit in correlating how the config RPC was built.
Configure OSPF on XE Device
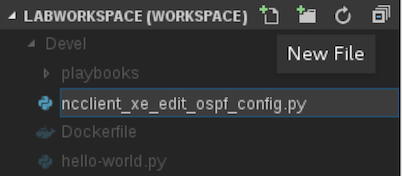
Return to Visual Studio Code and create a new Python file called ncclient_xe_edit_ospf_config.py.
You can copy this file below for ease to name your file.
ncclient_xe_edit_ospf_config.py
The XML RPC constructed for configuring OSPF on your XE platform uses the platform's native model called
Cisco-IOS-XE-native that has a router container. This router container is then
augmented by the Cisco-IOS-XE-ospf YANG model that provides the augmentation for OSPF related configuration.
There is a link below that will open a truncated view of the Cisco-IOS-XE-opsf YANG model that you can use to correlate to the
elements (containers, lists, leafs, etc) in the XML RPC used in your Python code. In the YANG snippet, the
relevant element sections are highlighted for you to make the correlation easier:
Copy the Python script below that uses the same manager class you've been working with in ncclient, but
this time uses its edit_config method that takes a configuration RPC and appropriate datastore.
The datastore used here is the "running" datastore because it is the XE platform.
            from ncclient import manager


            def main():
                """
                Main method that prints netconf capabilities of device.
                """

                device = {"ip": "10.2.100.11", "port": "830", "platform": "csr",}

                with manager.connect(host=device['ip'], port=device['port'], username='admin',
                                     password='cisco.123', hostkey_verify=False,
                                     device_params={'name': device['platform']},
                                     look_for_keys=False, allow_agent=False) as m:

                    rpc = '''
                            <config>
                                <native xmlns="http://cisco.com/ns/yang/Cisco-IOS-XE-native">
                                    <router>
                                        <ospf xmlns="http://cisco.com/ns/yang/Cisco-IOS-XE-ospf">
                                            <id>100</id>
                                            <router-id>1.1.1.1</router-id>
                                            <network>
                                                <ip>10.1.1.0</ip>
                                                <mask>0.0.0.3</mask>
                                                <area>0</area>
                                            </network>
                                        </ospf>
                                    </router>
                                </native>
                            </config>
                        '''

                    reply = m.edit_config(rpc, target='running')
                    print(reply)


            if __name__ == '__main__':
                main()
Remember to save your new Python script using Ctrl+s. Once saved, return to your container workspace in your Terminal.
From within the container, execute your first Python script: ncclient_xe_edit_ospf_config.py:
            cd /workspace/
            python3.6 ncclient_xe_edit_ospf_config.py
Because your code has a print statement at the end, you should see a similar output as below within your
container that is an rpc-reply with an ok:
            [root@25ef0c91db80 workspace]# python3.6 ncclient_xe_edit_ospf_config.py
            <?xml version="1.0" encoding="UTF-8"?>
            <rpc-reply xmlns="urn:ietf:params:xml:ns:netconf:base:1.0" message-id="urn:uuid:bb654115-55af-4424-84f3-4e2fe70c3c82" xmlns:nc="urn:ietf:params:xml:ns:netconf:base:1.0"><ok/></rpc-reply>
            [root@25ef0c91db80 workspace]#
Configure OSPF on XR Device
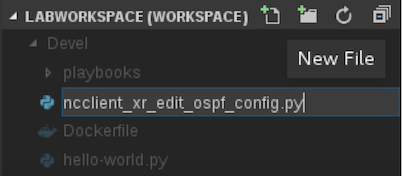
Return to Visual Studio Code and create a new Python file called ncclient_xr_edit_ospf_config.py.
You can copy this file below for ease to name your file.
ncclient_xr_edit_ospf_config.py
The XML RPC constructed for configuring OSPF on your XR platform uses the platform's native model called Cisco-IOS-XR-ipv4-ospf-cfg. It's important to note that this model differs slightly than that of XE's model above. This model can be used directly and does not augment a top-level native model. There is a link below that will open a truncated view of the Cisco-IOS-XR-ipv4-ospf-cfg YANG model that you can use to correlate to the elements (containers, lists, leafs, etc) in the XML RPC used in your Python code. Like the XE model, this model makes use of the grouping capability in YANG and uses those groupings in relevant containers. The actual ospf container starts at line 127 where it uses the groupings found above it. In the YANG snippet, the relevant element sections are highlighted for you to make the correlation easier.
Cisco-IOS-XR-ipv4-ospf-cfg
Copy the Python script below that uses the manager class' edit_config method with the
"candidate" datastore since this is the XR platform.
            from ncclient import manager


            def main():
                """
                Main method that prints netconf capabilities of device.
                """

                device = {"ip": "10.2.100.12", "port": "830", "platform": "iosxr",}

                with manager.connect(host=device['ip'], port=device['port'], username='admin',
                                     password='cisco.123', hostkey_verify=False,
                                     device_params={'name': device['platform']},
                                     look_for_keys=False, allow_agent=False) as m:

                    rpc = '''
                            <config>
                                <ospf xmlns="http://cisco.com/ns/yang/Cisco-IOS-XR-ipv4-ospf-cfg">
                                    <processes>
                                        <process>
                                            <process-name>100</process-name>
                                            <default-vrf>
                                                <router-id>2.2.2.2</router-id>
                                                <af>
                                                    <af-name>ipv4</af-name>
                                                    <saf-name>unicast</saf-name>
                                                </af>
                                                <area-addresses>
                                                    <area-area-id>
                                                        <area-id>0</area-id>
                                                        <running></running>
                                                        <name-scopes>
                                                            <name-scope>
                                                                <interface-name>GigabitEthernet0/0/0/0</interface-name>
                                                                <running></running>
                                                            </name-scope>
                                                            <name-scope>
                                                                <interface-name>GigabitEthernet0/0/0/1</interface-name>
                                                                <running></running>
                                                            </name-scope>
                                                        </name-scopes>
                                                    </area-area-id>
                                                </area-addresses>
                                            </default-vrf>
                                            <start></start>
                                        </process>
                                    </processes>
                                </ospf>
                            </config>
                        '''

                    reply = m.edit_config(rpc, target='candidate')
                    print(reply)
                    reply = m.commit()
                    print(reply)


            if __name__ == '__main__':
                main()
Save your Python script using Ctrl+s. From within the container, execute your second Python script: ncclient_xr_edit_ospf_config.py:
            cd /workspace/
            python3.6 ncclient_xr_edit_ospf_config.py
Because your code has a print statement at the end, you should see a similar output as below within your
container that is an rpc-reply with an ok:
            [root@25ef0c91db80 workspace]# python3.6 ncclient_xr_edit_ospf_config.py
            <?xml version="1.0"?>
            <rpc-reply message-id="urn:uuid:95b21e2b-f42f-4c42-b185-62f805873abe" xmlns:nc="urn:ietf:params:xml:ns:netconf:base:1.0" xmlns="urn:ietf:params:xml:ns:netconf:base:1.0">
             <ok/>
            </rpc-reply>

            <?xml version="1.0"?>
            <rpc-reply message-id="urn:uuid:371ca5e8-bd9d-4823-8792-237ad3cefd34" xmlns:nc="urn:ietf:params:xml:ns:netconf:base:1.0" xmlns="urn:ietf:params:xml:ns:netconf:base:1.0">
             <ok/>
            </rpc-reply>

            [root@25ef0c91db80 workspace]#
Configure OSPF on NX Device
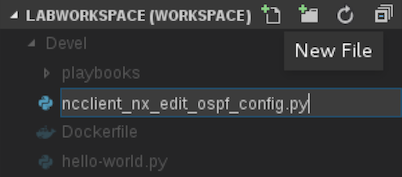
Return to Visual Studio Code and create a new Python file called ncclient_nx_edit_ospf_config.py.
You can copy this file below for ease to name your file.
ncclient_nx_edit_ospf_config.py
The XML RPC constructed for configuring OSPF on your NX platform uses the platform's native model called Cisco-NX-OS-device (derived from the platforms REST API). There is a link below that will open a truncated view of the Cisco-NX-OS-device YANG model that you can use to correlate to the elements (containers, lists, leafs, etc) in the XML RPC used in your Python code. Like the previous models, this model makes use of the grouping capability in YANG and uses these groupings to link to additional containers. The actual starting point is at the System group on line 16, which then uses the ospf_Entity-group. Continue to follow which groups are used to see and correlate the elements in the XML RPC below. In the YANG snippet, the relevant element sections are highlighted for you to make the correlation easier.
Cisco-NX-OS-device
Copy the Python script below that uses the manager class' edit_config method with the
"running" datastore since this is the NX platform.
            from ncclient import manager


            def main():
                """
                Main method that prints netconf capabilities of device.
                """

                device = {"ip": "10.2.100.13", "port": "830", "platform": "nexus",}

                with manager.connect(host=device['ip'], port=device['port'], username='admin',
                                     password='cisco.123', hostkey_verify=False,
                                     device_params={'name': device['platform']},
                                     look_for_keys=False, allow_agent=False) as m:

                    rpc = '''
                            <config>
                                <System xmlns="http://cisco.com/ns/yang/cisco-nx-os-device">
                                    <ospf-items>
                                        <inst-items>
                                            <Inst-list>
                                                <name>100</name>
                                                <dom-items>
                                                    <Dom-list>
                                                        <name>default</name>
                                                        <rtrId>3.3.3.3</rtrId>
                                                        <if-items>
                                                            <If-list>
                                                                <id>eth1/1</id>
                                                                <advertiseSecondaries>true</advertiseSecondaries>
                                                                <area>0.0.0.0</area>
                                                            </If-list>
                                                        </if-items>
                                                    </Dom-list>
                                                </dom-items>
                                            </Inst-list>
                                        </inst-items>
                                    </ospf-items>
                                    <fm-items>
                                        <ospf-items>
                                            <adminSt>enabled</adminSt>
                                        </ospf-items>
                                    </fm-items>
                                </System>
                            </config>
                        '''

                    reply = m.edit_config(rpc, target='running')
                    print(reply)


            if __name__ == '__main__':
                main()
Save your Python script using Ctrl+s. From within the container, execute your first Python script: ncclient_nx_edit_ospf_config.py:
            cd /workspace/
            python3.6 ncclient_nx_edit_ospf_config.py
Because your code has a print statement at the end, you should see a similar output as below within your
container that is an rpc-reply with an ok:
            [root@25ef0c91db80 workspace]# python3.6 ncclient_nx_edit_ospf_config.py
            <?xml version="1.0" encoding="UTF-8"?>
            <rpc-reply xmlns:if="http://www.cisco.com/nxos:1.0:if_manager" xmlns:nfcli="http://www.cisco.com/nxos:1.0:nfcli" xmlns:nxos="http://www.cisco.com/nxos:1.0" xmlns:vlan_mgr_cli="http://www.cisco.com/nxos:1.0:vlan_mgr_cli" xmlns="urn:ietf:params:xml:ns:netconf:base:1.0" message-id="urn:uuid:fe49c18c-eece-4361-9f8f-fcbdcb63d692">
                <ok/>
            </rpc-reply>

            [root@25ef0c91db80 workspace]#
Verify OSPF Peering
At this point, your three network devices should be OSPF peers in OSPF 100 Area 0. Login to your devices and verify.
XE
In your container, just type xe on the commandline and login to your XE device using
cisco.123 to confirm the configuration using show run | sec ospf:
show run | sec ospf
            Pod00-CSRv#show run | sec ospf
            router ospf 100
             router-id 1.1.1.1
             network 10.1.1.0 0.0.0.3 area 0
            Pod00-CSRv#
Then, verify that your XE device is peers with your XR device using show ip ospf neighbor:
show ip ospf neighbor
            Pod00-CSRv#show ip ospf neighbor

            Neighbor ID     Pri   State           Dead Time   Address         Interface
            2.2.2.2           1   FULL/BDR        00:00:31    10.1.1.2        GigabitEthernet2
            Pod00-CSRv#
XR
In your container, after you exit from your XE device, type xr on the commandline and login to
your XR device using cisco.123 to confirm the configuration using
show run router ospf:
show run router ospf
            RP/0/RP0/CPU0:Pod00-XRv#show run router ospf
            Mon May 21 18:18:06.261 UTC
            router ospf 100
             router-id 2.2.2.2
             address-family ipv4 unicast
             area 0
              interface GigabitEthernet0/0/0/0
              !
              interface GigabitEthernet0/0/0/1
              !
             !
            !

            RP/0/RP0/CPU0:Pod00-XRv#
Then, verify that your XR device is peers with your XE and NX devices using show ospf neighbor:
show ospf neighbor
            RP/0/RP0/CPU0:Pod00-XRv#show ospf neighbor
            Mon May 21 18:25:25.300 UTC

            * Indicates MADJ interface
            # Indicates Neighbor awaiting BFD session up

            Neighbors for OSPF 100

            Neighbor ID     Pri   State           Dead Time   Address         Interface
            1.1.1.1         1     FULL/DR         00:00:39    10.1.1.1        GigabitEthernet0/0/0/0
                Neighbor is up for 00:10:34
            3.3.3.3         1     FULL/BDR        00:00:37    10.2.2.1        GigabitEthernet0/0/0/1
                Neighbor is up for 00:01:42

            Total neighbor count: 2
            RP/0/RP0/CPU0:Pod00-XRv#
NX
In your container, after you exit from your XE device, type xr on the commandline and login to
your XR device using cisco.123 to confirm the configuration using
show run router ospf:
show run ospf
            Pod00-N9Kv# show run ospf

            !Command: show running-config ospf
            !Time: Mon May 21 18:22:31 2018

            version 7.0(3)I7(3)
            feature ospf

            router ospf 100
              router-id 3.3.3.3

            interface Ethernet1/1
              ip router ospf 100 area 0.0.0.0


            Pod00-N9Kv#
Then, verify that your NX device is peers with your XR device using show ip ospf neighbors:
show ip ospf neighbors
            Pod00-N9Kv# show ip ospf neighbors
             OSPF Process ID 100 VRF default
             Total number of neighbors: 1
             Neighbor ID     Pri State            Up Time  Address         Interface
             2.2.2.2           1 FULL/DR          00:01:27 10.2.2.2        Eth1/1
            Pod00-N9Kv#
If you do not have OSPF neighbors then please contact an instructor. If you do, please proceed to working with Cisco's Yang Development Kit (YDK); an object oriented method of working with YANG models.

